Using a graphics program to add text and elements to postscript output
Question:
How can I improve the appearance of the text on my plots for publication?
In PyFerret, we can specify true fonts using the SET TEXT command. With SET TEXT, individual text groupings or user-added labels can be customized with a particular text style. In addition, the FRAME command has options to save the graphics image as a pdf, png, ps or svg file. This FAQ applies to Classic Ferret.
Example:
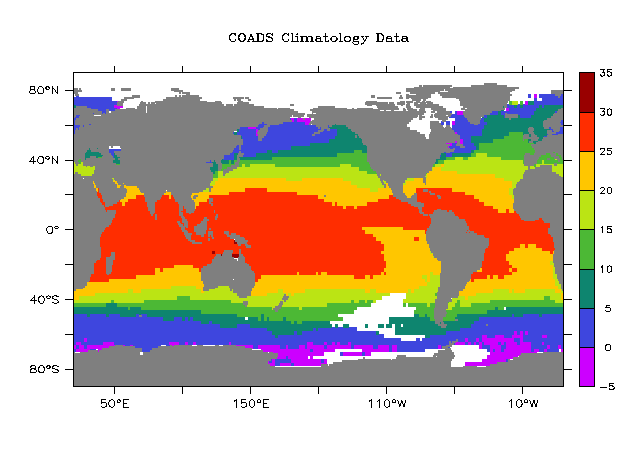
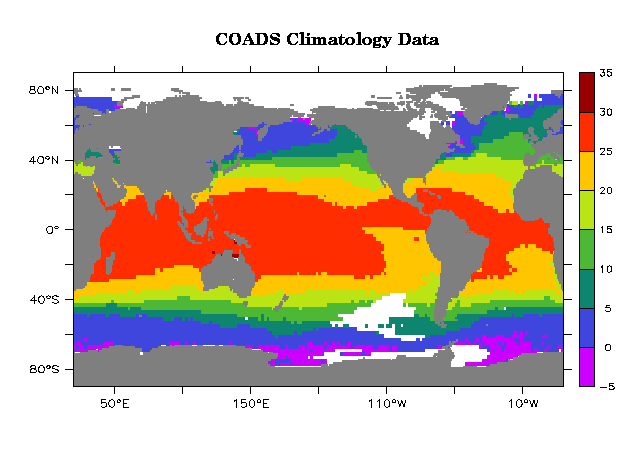
Example graphic output:

In this FAQ we show how to change the label above the plot, replacing the text with a bold font.

Generated with this script
 yes? set mode meta
 yes? set win/size=0.3
 yes? use coads_climatology
 yes? shade/l=1/nolab/set sst
 yes? ppl axlsze,0.14,0.14
 yes? ppl shade
 yes? go fland
 yes? label/nouser `($ppl$xlen)/2`,`($ppl$ylen)*1.1`,0,0,0.15 "@CRCOADS Climatology Data"
 yes? exit

 > Fprint -o xfig_1.ps metafile.plt
Explanation:
The fonts within Ferret are not always satisfactory for the size and kind of graphics needed for publications. Editing the postscript with a graphics program to replace text is often a good solution.
Solution:
The free software xfig can import your Ferret postscript file as an image. Then within xfig, draw white-filled rectangles covering any text or other elements you want to replace, and add text in the desired font and size. The graphics can be output from xfig in a number of file formats, including postscript, encapsulated postscript, LaTeX, PDF, JPEG and GIF.
xfig is available at https://www.xfig.org/
Here are a few hints about using xfig on a postscript output from Ferret:
- Write a metafile from Ferret and convert it to postscript with the Fprint command. Xfig can also import a gif file.
- Open xfig and use the picture icon to import the postscript file. The figure can be rotated if needed, but since the rotation is centered about one corner of the figure, you may find it works better to edit the postscript before importing it, removing the line that starts with
-90 rotate - You cannot edit existing text within the figure, it is just an image in xfig. Changing text on your plot is a matter of drawing a white rectangle to cover any text you want to remove (or use Ferret commands like /NOLABEL to remove text as you create the figure). Then add text with the text tool in xfig, choosing among its fonts.
- Use the Rectangular Box drawing tool to make white rectangles, with the line and fill set to white, and solid fill pattern. Draw them on top of any text or other elements you want to replace or remove. Set their Depth value to a number less than 50 so they will be output "on top of" the image.
- Enter Text mode, set the line color to black, and choose the text size and font.Enter the text you want. If you are replacing the labels on an axis or color key, it can bedifficult to get the right placement with mouse clicks. The alignment can be improved in a later step.
- Use "glue objects into compound object" to keep a set of labels and a white rectangle together so you can move them around.
- When finished, SAVE the file to a .fig file. This is xfig's native output type, and it is an ASCII file containing of codes describing the editing you did, and the name of the postscript file that was imported. The .fig file can be edited to work on lists of values which are a set of labels for an axis or key. The last 3 values in these lists are the X location, Y location, and the text. You can adjust these to make sure that all the Y locations are the same for a vertical key, for instance; or to make sure labels are equally spaced.
- Once you have a .fig file for one plot, You can save a copy of it to use as a template for other plots which have the same length axes. Edit this template for different Ferret postscript files, replacing the input Ferret postscript file name,and changing the content of labels as needed.
- When the .fig file is to your liking, choose export under xfig's File menu. Choose the type of file and name it.


